
Aid Classifications let you create templates for your different financial aid applications. When you plug a classification into a student's aid application, it automatically supplies cost of attendance, enrollment information, and application components.
When packaging aid, classifications can be used in concert with Aid Year Schedules to originate aid packages with COD. The two items supply key information for the financial package: Cost of Attendance, enrollment status, and a disbursement schedule (among other items). You can include aid classifications in aid year schedules (covered in the next setup step).
To get started, go to Financial Aid > Settings > Aid Classifications.
How to add an aid classification
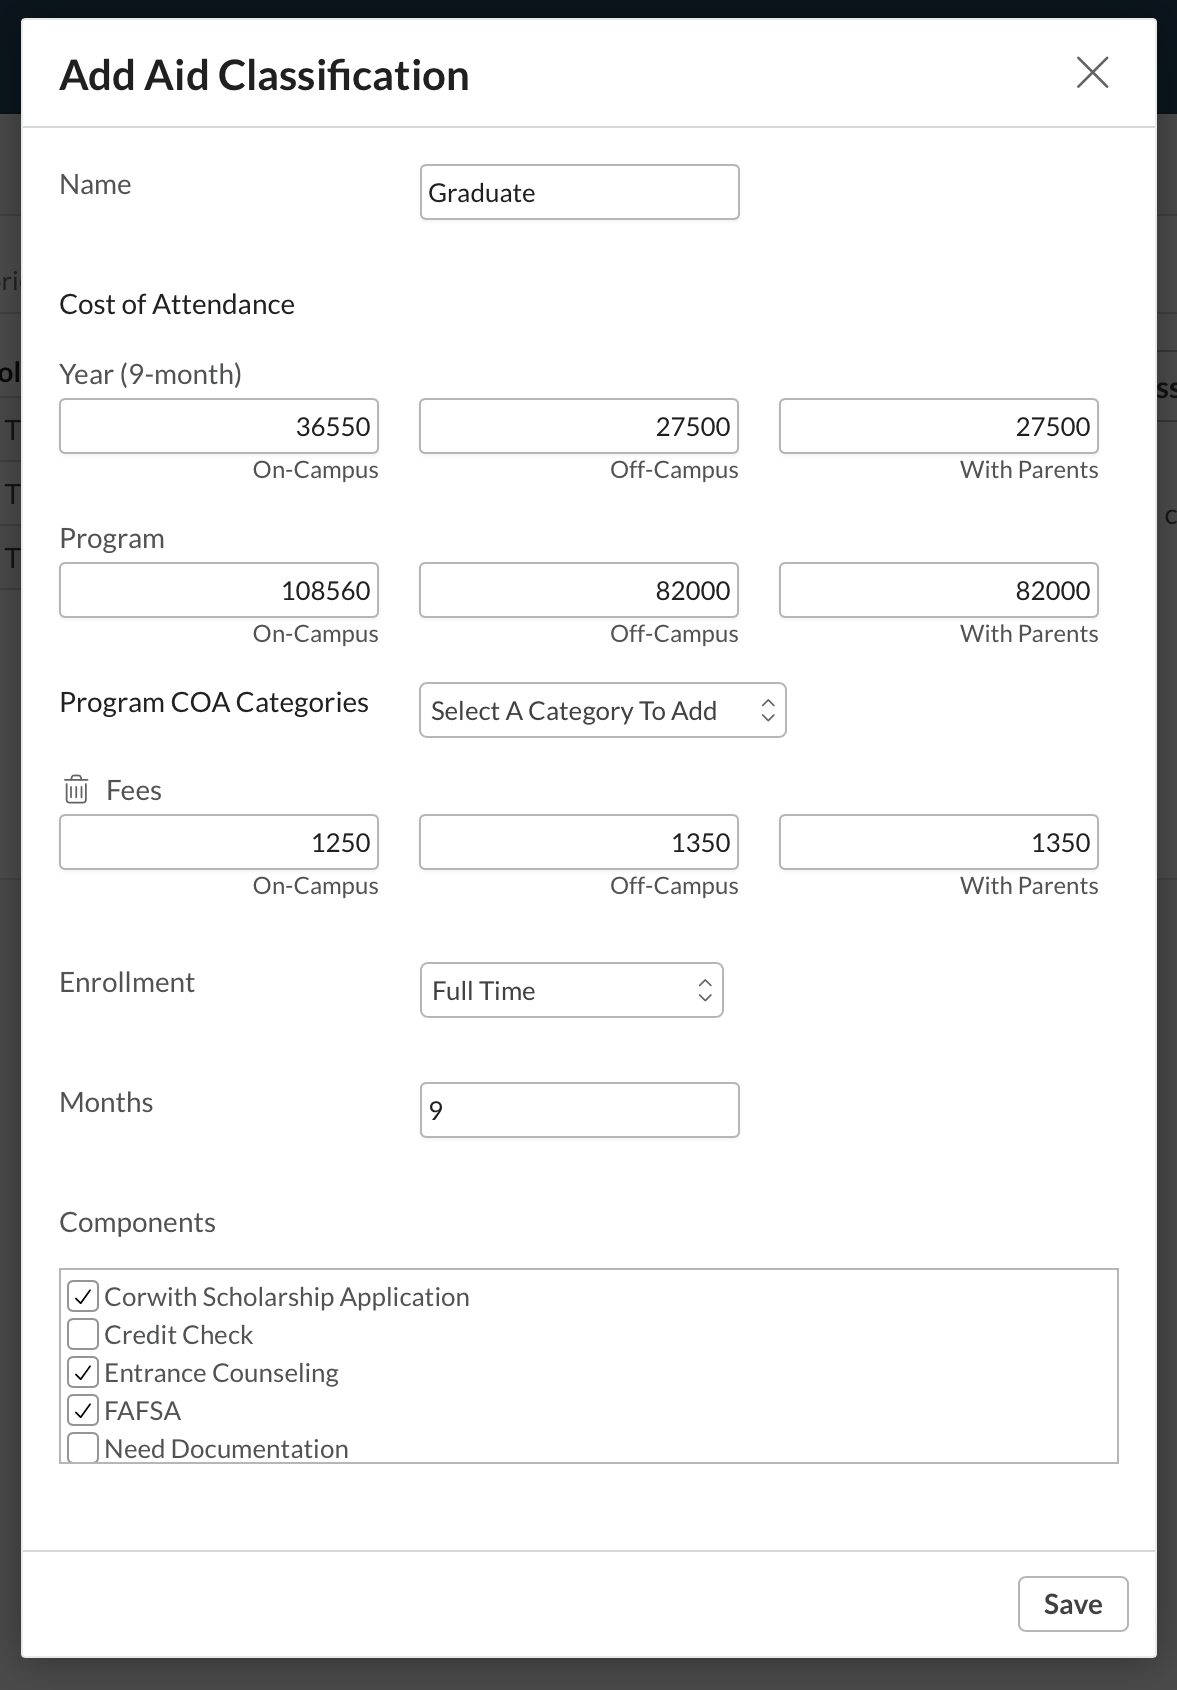
- Click Add Classification.
- Give the classification a name—for example, Masters Part-Time or Undergraduate Online.
- Enter the details:
- Enter amounts in the appropriate Cost of Attendance fields. If your school doesn't have a certain offering, leave it blank—for example, if you only offer on-campus courses, leave the Off Campus fields blank.
- Select Program COA Categories (created in the previous step) from the drop-down.
- For each COA category, specify the appropriate amounts.
- Select the enrollment type.
- Enter the number of months the student's program will occur in a given aid year.
- Check the application components you want to include in this classification.
- Click Save.
To edit a classifcation, click its name to go to its page or click in the Actions column and select Edit Aid Classification.
Retire a classification by clicking and selecting Retire Aid Classification.
0 Comments