This article describes how to set up and use Admissions Letters, which you can use to print and send to applicants after you accept and/or decline their application.
Setup
You need two things to get rolling with admissions letters.
- In Admissions > Settings > Other Settings, find the Show Admissions Letters setting and set it to Yes (it's turned on by default, but it's worth checking nonetheless).
- In Communications > Print Layouts, you'll need to set up the built-in Acceptance Letter layout and, if desired, add and modify a "Rejection Letter" layout.
- You'll likely need help setting up the layout. Populi Support is here to help!
- To add a rejection letter layout, click Add a Print Layout and select Admissions Letter as the type and Rejection Letter as the sub-type.
Printing Letters
Before you print an admissions letter, you have to make a decision about an application—that is, you have to set its status to Accepted or Declined. Once you do that, a letter is generated (you, a higher education professional, can deduce which status will produce which type of letter)—but it only exists deep within Populi's imagination. To summon it forth, you have to "print" it; by "print", we mean "produce a PDF" which you can then send to your printer.
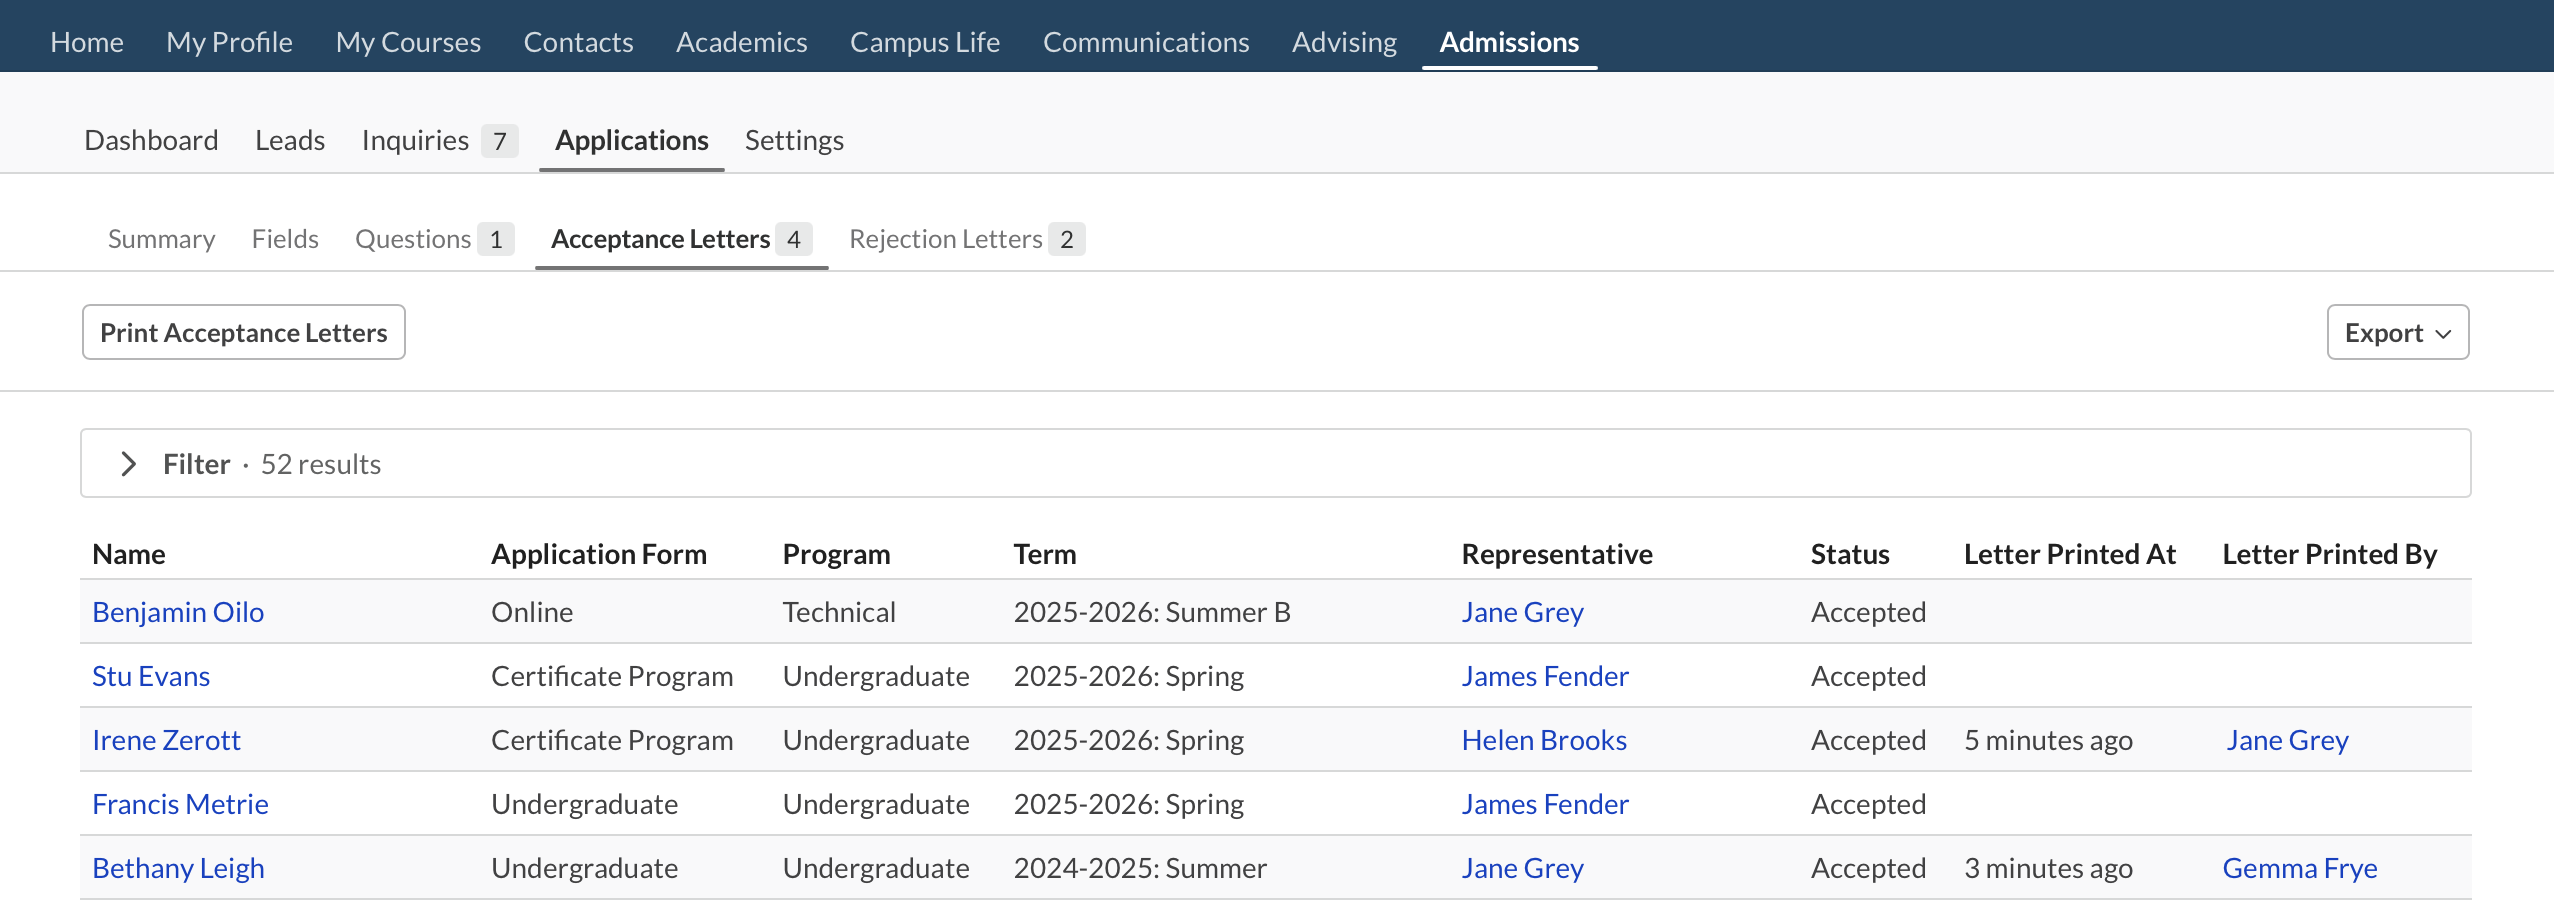
If you want to print a whole bunch of letters, go to Admissions > Applications and choose either Acceptance Letters or Rejection Letters. These are reports you can filter and export to XLS or CSV. Once the report is filtered to your liking, click Print Letters. This produces a single PDF containing all of the letters that were included in your report filter.
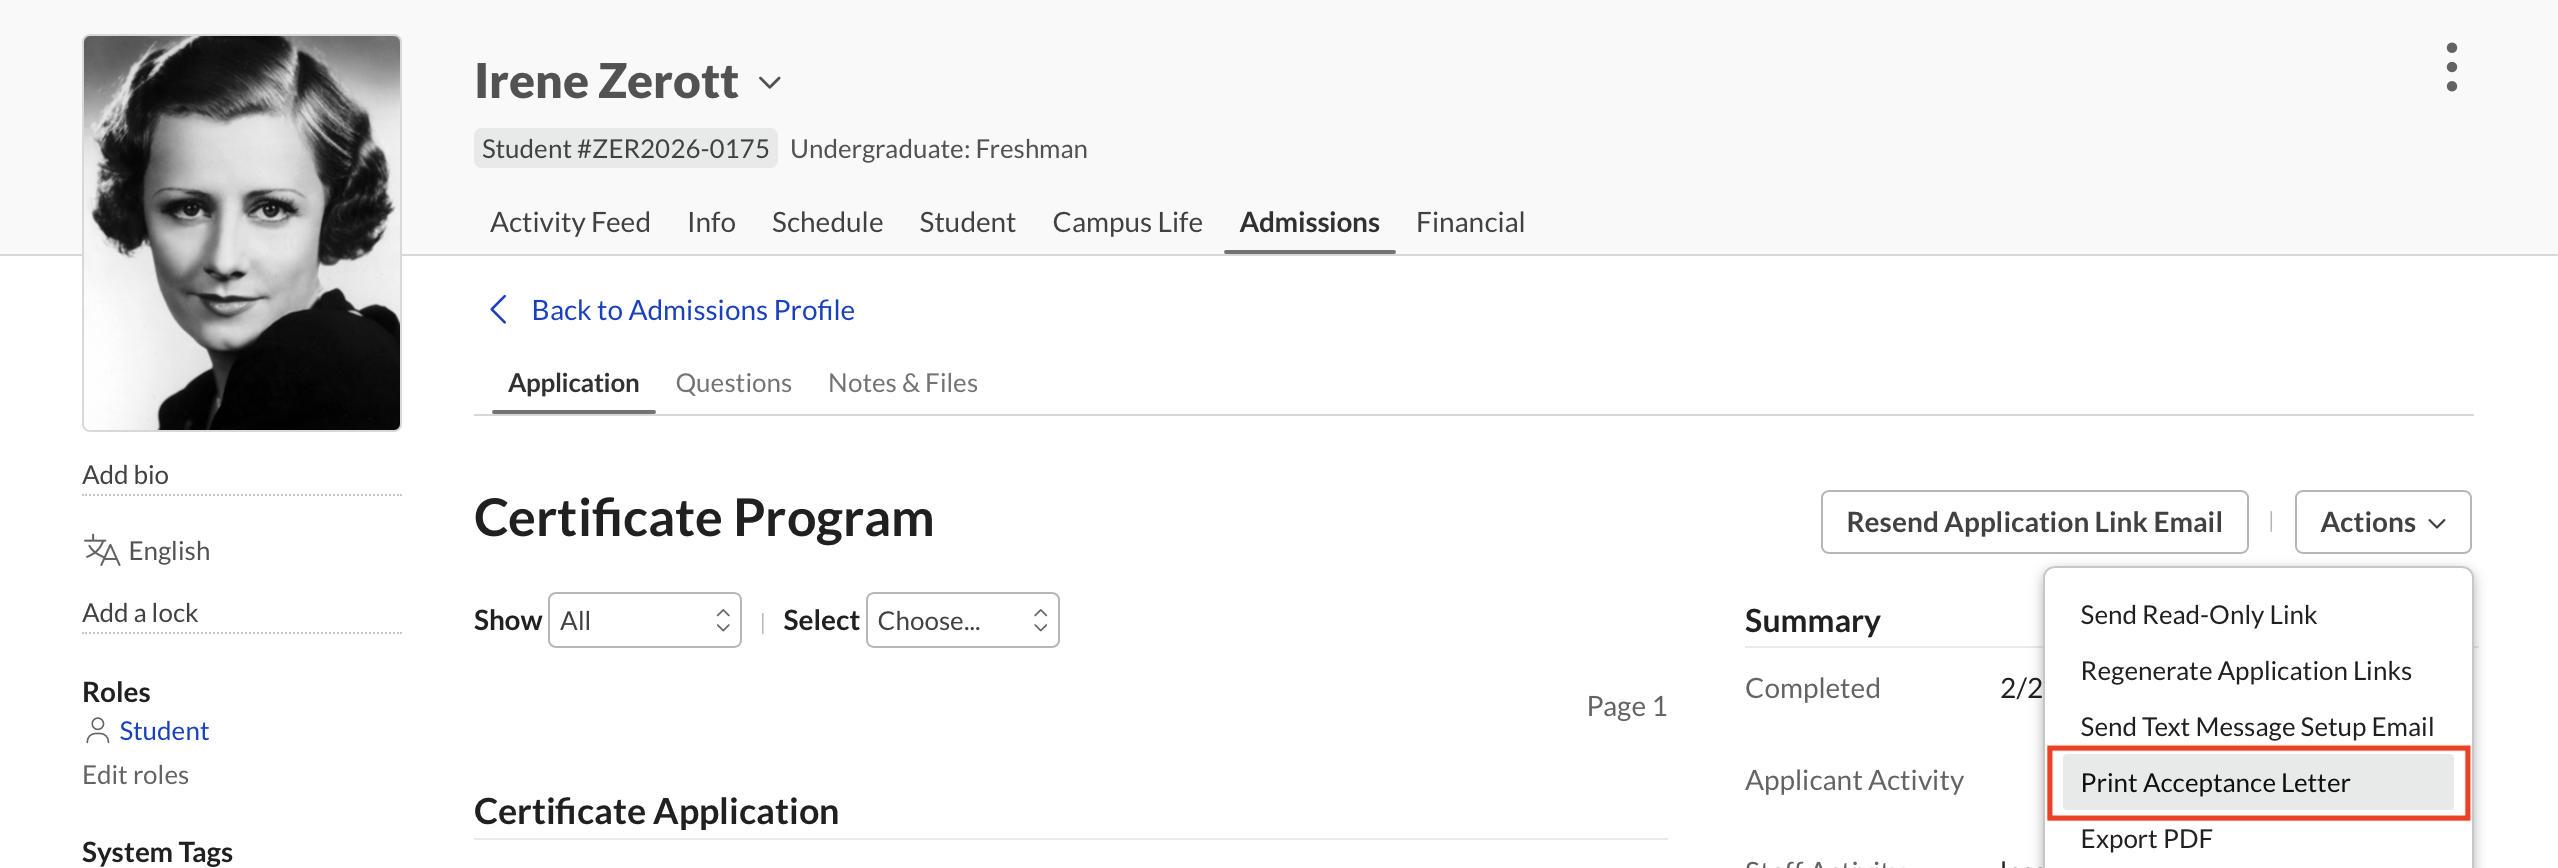
If you want to print a letter for one, single lucky (or unlucky, as the case may be) student, go to her application, click Actions, and select Print Acceptance/Rejection Letter.
0 Comments