There are three ways to grant user access to someone in Populi:
- To give it to an individual person, go to his profile.
- When you accept an applicant as a student, you can give his a user account.
- To give it to groups of people all at once, Account Admins can use the Create Users action in Contacts > People or Academics > Reporting > Data Slicer.
Need to delete a user account? Have a look at this.
A few things about usernames
- Populi's default username format is first initial, last name, and last two numerals of the current year. If you give John Smith an account in January 2025, his automatically-generated username will be jsmith25. To change the default username format, have a look at this article.
- Strictly speaking, you can't change someone's username. You can, however, remove someone's user access and then immediately re-add it with a new username. This article tells you how.
- This article describes how to free up a deleted/inactive username for re-use by a new user account.
To grant user access to an individual, start by going to his profile


- Check his user status to the right of his name in the gray bar. If he's a user, you'll see a notice saying Active User. If not, click the menu button and select Make this person a user.
- Select Is a user from the status drop-down.
- Populi automatically generates a username/email with his first initial, last name, and the last two digits of the current year—or any custom username format you've set up. Keep this username, or enter another username.
- Choose an alternate email. The Welcome email will be sent to this address. If you don't have any email addresses entered for him yet, close the dialog box, enter an email address under contact info, then go back to Step 1.
- Click Save.

Adding user accounts in bulk on Contacts > People and Data Slicer
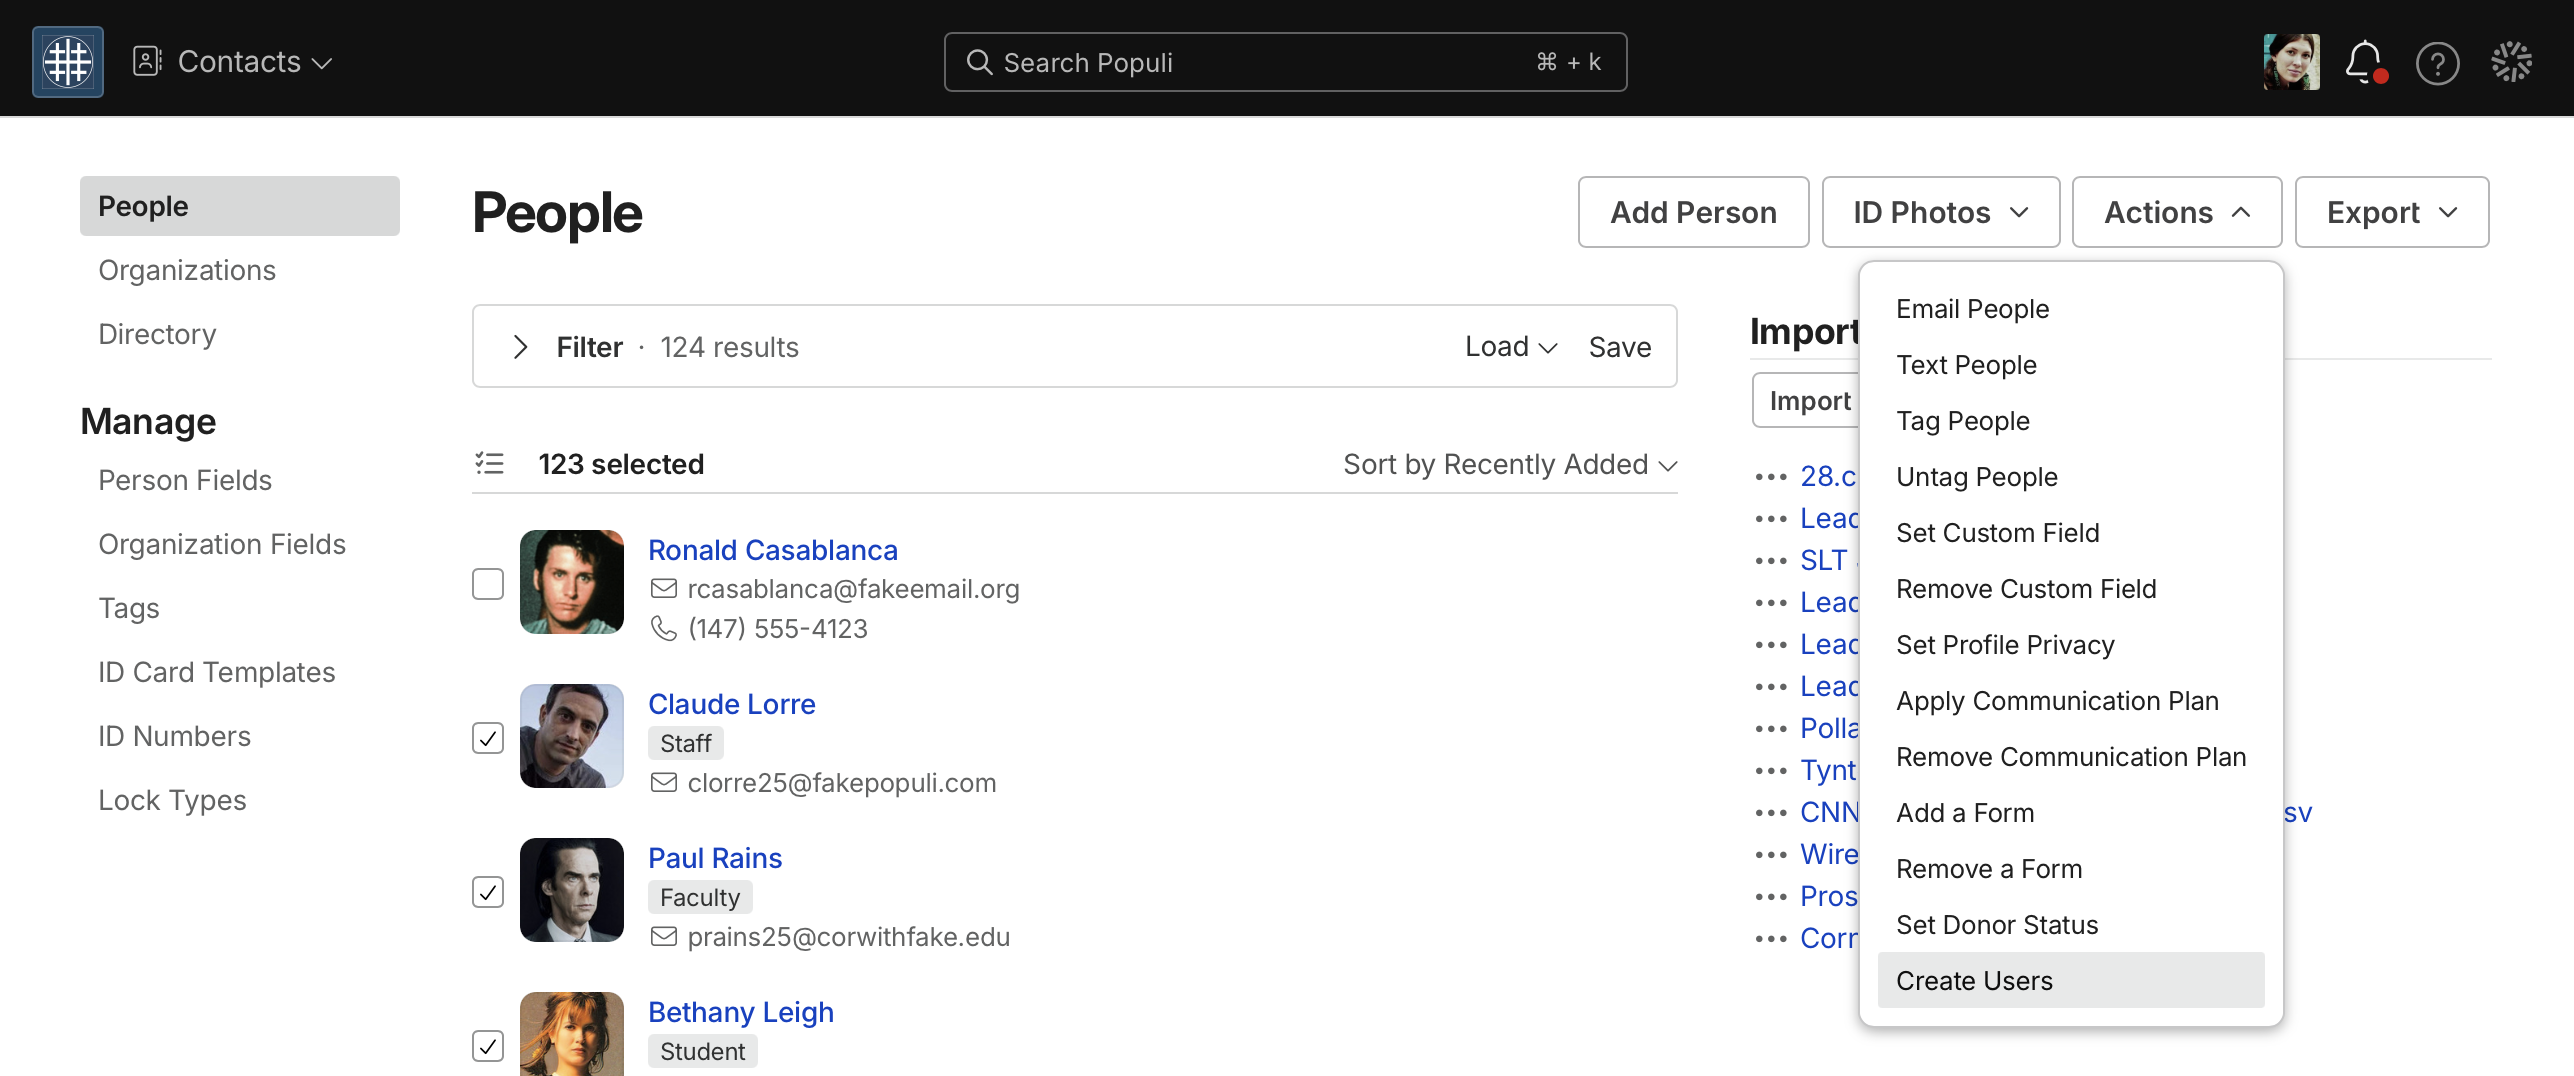
Contacts > People and the Data Slicer let an Account Admin create user accounts for a group of people (Contacts lets you do so for anyone, Data Slicer only does so for students).
- Run a report or load an existing one.
- Review the results and check/uncheck people for whom you'd like to create user accounts. Keep in mind that the action will not work if you try to create more than 2000 new users, so pare down your results accordingly.
- Click Actions and select Create Users.
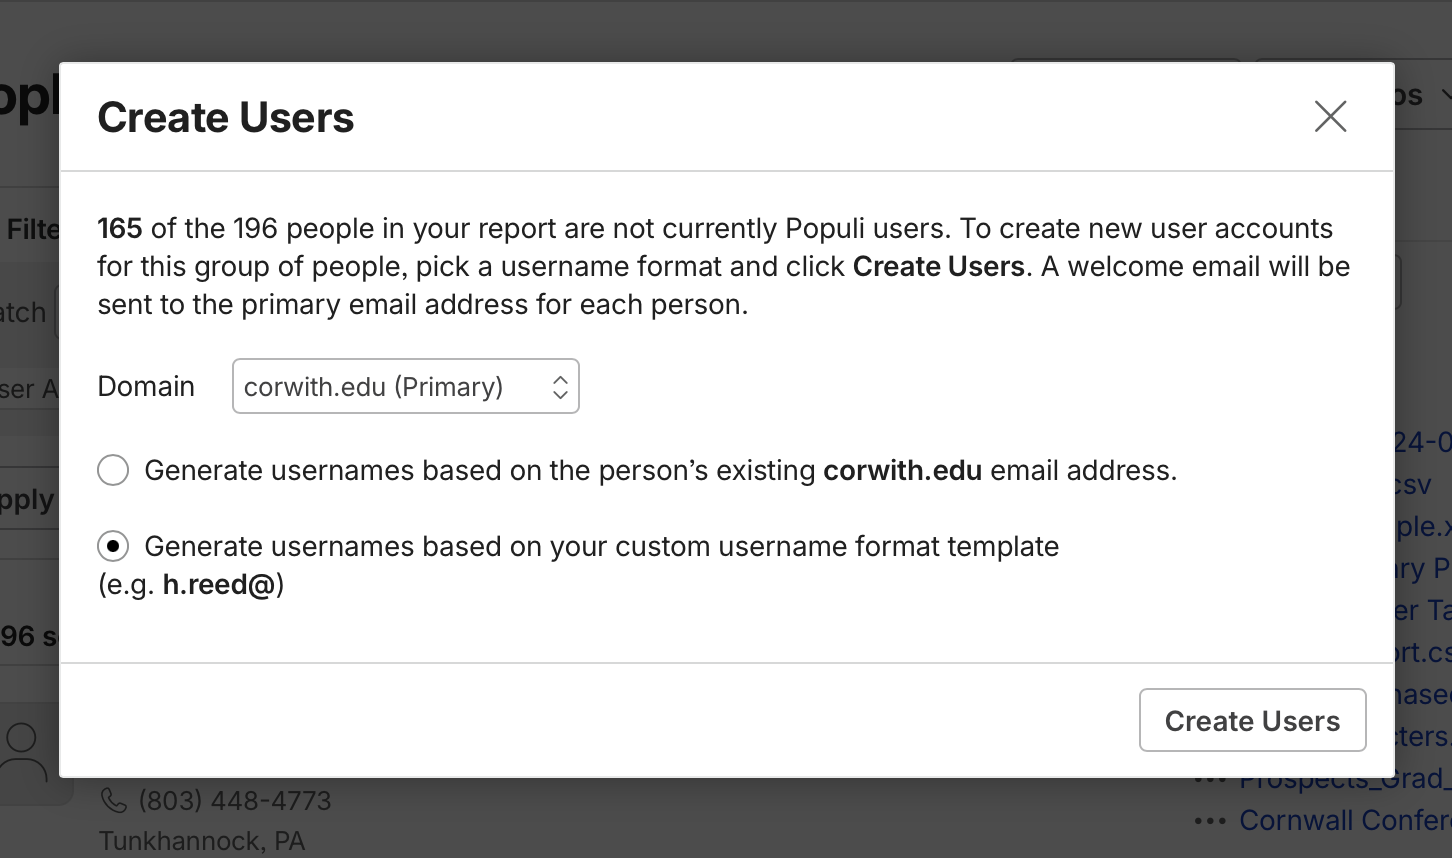
- Review the information in the dialog; depending on your school's email setup, you may have the option to choose the username format. If everything looks good, click Create Users.
- People who already have a user account will be skipped in this operation.
- People without an email address will have user accounts, but there won't be any way to send them a welcome email. If you create accounts for such people, you'll need to add an email address to them and then resend the welcome email.
When you create a new user account, the user gets a welcome email

The welcome email comes from notifications@populi.coand contains a link to set a Populi password and log in for the first time. He'll needs to log in within thirty calendar days of receiving the email. After that, the link expires, and you'll need to resend the welcome email.
After setting his password, he's now a full-fledged Populi user
He can now log in and make changes to Populi appropriate to the roles you gave him.
Resetting login info

Using the Active User notice, you can:
- Edit his user information.
- Reset his password; when doing so, you'll need to select the email address to which you'd like to send the password reset.
- If the user hasn't logged in yet, this option will let you resend the welcome email.
- If he's required to use login approvals, you can reset his authenticator app credentials; to continue using login approvals after this, he'll need to start from scratch.
- Reset his text number by selecting an email address to which you'll send the text number reset link.
How to block a user

Blocking a user prevents his from logging in (it does not affect any of his roles).
- Click Active User.
- Check next to Blocked.
- Enter a reason for the block (optional).
- Click Save.
- To un-block him, just come back to this dialog and un-check Blocked.
Login approvals
You can control whether a user is required to use login approvals. Read about login approvals in this article.
- Click Active User.
- Check next to Login approvals to require it of the user (you cannot require it of people who only have the Student and/or Library Patron roles). If they're required, you can un-check to remove the requirement. Your choice here affects only this user; it is independent of the role-level setting chosen by the Account Admin in Account > Security.
- Click Save.
How to remove user access
Removing user access does not affect anything else about his record. It just means he can't log in and make changes any more!
- Click Active User.
- Select Is not a user from the status drop-down.
- Click Save.
- Her email is now permanently deleted.
0 Comments